Art dolls are one of a kind objects that bring back memories of our childhood. Art dolls made by MioPupazzo are tiny fairy creatures that belong to our favorite fairy tales books. I was curious to know more about MioPupazzo and her beautiful art.

Can you please tell us a bit about yourself?
I was born and raised in a loving family in one of the most beautiful cities in the world - St. Petersburg, Russia. The city is famous for its tsars' palaces turned into world class museums and parks.
From an early age I often visited such places as the Hermitage museum or Peterhof known for their architecture and beauty. Almost every weekend my mom took me to a museum. My favorite one was a museum of decorative and applied arts.
As beautiful as St. Petersburg is, its climate is not that welcoming. In 2003 I moved to warm and sunny Israel on the Mediterranean coast, where there is no snow at all. My new country and a different climate somehow changed me. I became a much more open and outgoing person. In Israel I met a lot of wonderful people and found something I fell in love with - making art dolls.

How did you start?
I graduated from St. Petersburg (Russia) Technical University with a major in material science and engineering. After graduation I worked in a patent office and that's where I met an amazing and very creative person. This lady taught classes on papier-mâché and had her shows at different art galleries. Inspired my her I made a few toys and participated in a Christmas show in 2000 in St-Petersburg. That was how my interest in dolls and handmade craft got to a totally different level.
When I just started creating dolls I experimented a lot. I tried every possible doll-making material. These days I mostly work with paper clay. In the beginning I made all kinds of traditional clothes for my dolls. Later my love for patchwork and dolls merged and I evolved my own signature style of tiny crazy quilting dolls dresses. I love the fact that my work is so tiny. Typically, fabric art works are done on a large scale - big wall panel or a quilt. I create the same layered textured effect but in tiny dolls' dresses and soft sculptures.

What are you working on know and what are your plans for the future?
I've been working with an American publisher C&T Publishing for two years. Together we have created a wonderful book “Enchanting Art Dolls & Soft Sculptures”, which will be published this summer. It's actually already available for pre-order on Amazon. In my book I talk about the technique of embroidery “crazy quilting” and the creation of dolls. There are 8 unique projects including a beautiful mermaid, a fantasy fish, an elegant princess, and a sweet teddy bear with step by step photos.
Last year I switched to the creation of small brooches-dolls. They are very cute! Dolls could be used as brooches or decorations for a purse. One can turn my brooches into an ornament or a home decor item.
I've recently came up with an idea of creating crazy quilted letters. Letters are very unusual and elegant. I'm not sure I’ll be able to recreate all alphabet letters though. I've already made “L” ,“O”, “V” ,and “E”.

What inspires you?
I love collecting old photos, especially those with small children and their toys. Girls in aprons with their beautifully dressed dolls or boys on rocking horses offer a lot of ideas for my art dolls. Also I have a huge collection of small decorative keys that inspires me in my creative process.


Friday, June 22, 2012
Art dolls by MioPupazzo
Wednesday, June 20, 2012
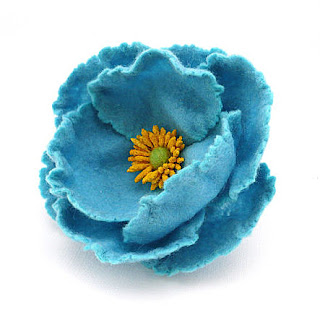
Exotic felted flowers by Roltinica
We all get inspired by beautiful flowers. In spring and summer with so many flowers in bloom we get positive energy just by stepping out into a garden or walking in a park. It’s somewhat harder to find flowers in winter though. I’ve recently came across an amazing artists Elena who makes exotic and beautiful felted flowers. She helps us stay surrounded by flowers during cold winter days.
Can you tell us a bit about yourself?
My name is Elena and I live in a beautiful city of Naberezhnye Chelny, Russia. I love flowers, nature and bright colors. Our nature is some what reserved and we don’t have exotic flowers and plants growing in our gardens and forests. Felting unique looking flowers is a way for me to compensate for the luck of nature diversity and complexity.

How did you start?
It all started with my daughter Tatiana once coming across a felted purse tutorial on the Internet. The idea of felting a purse was quite inspiring and we ended up making one. That’s how I started hand felting.
Russian traditions of felting date back centuries and these days there are a lot of books and tutorials on how to felt pretty much anything. After experimenting with making a purse and other items I tried to make a flower. The process absorbed me completely and I make mostly flowers ever since.
I felt pretty much every day and experiment with felting a lot. I’ve come up with my own technique of felting flowers so that fluffy wool turns into smooth and soft yet firm flower petals. I try to make my flowers look real and the only thing that makes them different is a lack a scent.

What inspires you?
My family supports and inspires me in everything and I’m very thankful for that. My mom is my most authoritative critic – if she does not like the flower, I will remake it.
Nature and flowers are great sources of inspiration for me. I experiment with felting a lot and new techniques and fibers offer new possibilities and let me create different and unique items. On top of wool silk is another fiber that is great for felting. Mixing wool and silk I make interesting textures that become exotic flowers.

What are your creative plans for the future?
I wish there were more that 24 hours in one day! I plan on writing a master class for flower felting. People are often curious to learn how I make my petals and stamens that look like real. I’ve been experimenting a lot with felting to get to the point where my felted flowers look fresh and live. I’ll be happy to share my knowledge with other felt loving artists.
Thank you, Elena

Monday, June 11, 2012
Wedding invitations and stationary by MamaTita
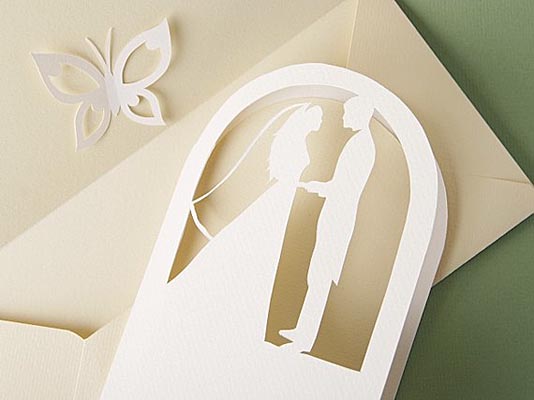
Summer months are ideal for weddings. Beautiful weather, flowers and the overall vacation mood make summers a perfect time for a wedding. With these thoughts in mind I came across a talented artist Nadezhda from MamaTita who makes wedding invitations and stationary. Nadezhda was very kind to talk to me about her art of making paper cutouts for weddings.

Can you tell us a bit about yourself?
My name is Nadezhda and I currently live in Latvia, Europe. I’m a very creative and artistic personality, although I don’t have a degree in either design or art. On one hand I’ve always dreamed about becoming a professional actress and an improviser. On the other hand I always longed for a family and children. Being a realistic person I perfectly understand that it’s hard to be a successful actress and a full time mom at the same time. After having my son I’ve shelved my theatrical plans and devoted myself to my family. All my creativity and artistic inspirations are now being channeled into my wedding invitations and stationary business.

How did you start making paper cutouts?
I always loved paper. Paper is a very rewarding material. Its flexibility and functionality opens up a lot of possibilities for creativity. The supply of art paper on the market is unbelievable and it very much helps in making the creative process more productive and rewarding.
The art of origami always fascinated me as well. As a hobby I buy tones of books about origami and create very sophisticated and intricate origami pieces.
What inspires you?
I’m always looking for new card stock and paper. There are so many amazing paper products out there and they serve as a huge source of inspiration for me.
Once I have a new idea in my head I rush to turn it into a finished product. I cannot usually wait till all the details of a new project sort out in my head. I need to act immediately. I create new designs step by step fixing and improving them on the go.
I’ve recently started experimenting with self hardening clay. I create cake toppers and other items for weddings out of the clay. Clay objects have very smooth surfaces and the material is very nice to touch and work with.

Thank you, Nadezhda!

Friday, June 8, 2012
Nursing teething crocheted necklaces by Julia Ermakovich
I came across teething and nursing crocheted necklaces looking for a baby shower gift for a friend. What a great idea! These necklaces are made of natural materials and I especially like the combination of plain wooden beads and crochet. Julia Ermakovich is an artist who creates bright and happy necklaces to entertain moms and their babies. I’m glad I had a chance to talk to her and ask her a few questions about herself and her art of making nursing necklaces.

Can you please tell us a bit about yourself?
I live in Moscow, Russia. Up until recently I’ve been working in a bank full time and had limited time for my family and my crocheting business. A month ago I quit and am now fully engaged in developing my business and enjoying my family and friends. So it’s all about crocheting now.

How did you start?
As long as I remember myself I’ve always been knitting and crocheting. First it was making items for my dolls and later for myself and my friends. Some 7 or 8 years ago reading a fashion magazine I came across pictures of crocheted necklaces. I decided to try as necklaces looked super stylish and cool. Besides it’s much easier to crochet a necklace than a man’s sweater!
It took me some time to figure our the technique and come up with the right design though. I started with making necklaces for my girl friends as gifts. People started taking about my necklaces and I got my first custom orders. It was great as with money earned through sales I could by more supplies and afford to try new materials and techniques.
About four years ago a friend of mine asked me to make her a necklace that would color match a sling and a baby carrier for her new born baby. Thus, a nursing and teething necklace was born!

What inspires you?
I make a lot of customs orders and my clients often share their ideas and designs with me. My clients' fantasy and imagination is unbelievable. They inspire me to create new designs and come up with new color patterns.
I’m a very eco conscious person and I am always looking for new eco-friendly materials that I could use in my nursing necklaces. There are so many products that are made of organic and natural fibers that we don’t know much about! Every time I come across a new fabric or a new fiber I feel a need to incorporate them into my designs. I’ve recently discovered buttons made of coconuts. They look great and are very nice to handle!

What are you most popular items?
It all depends on what group of my clients we are talking about. Sometimes young moms are looking for something to wear every day. I make them necklaces of neutral color combinations that are less flashy and bright.
If my clients are looking for something to entertain their babies with I make necklaces bright and happy. I can add a crocheted animal or a wooden ring to make the necklace more attractive for a child.
Thank you, Julia!

Wednesday, June 6, 2012
Articulated Paper Dolls by Dubrovskaya
I came across these amazing paper dolls browsing the internet. They bring back memories of childhood and times when we played in our imaginary worlds days after days. These were wonderful times when we had no responsibilities, no obligations and no worries. Paper dolls by Dubrovskaya look so different and yet so familiar. I’m glad I had a chance to talk to the artists about her life and her art of making articulated paper dolls.

Could you tell us a bit about yourself?
My name is Maria. I grew up in a family of an artist and a teacher in a city in Siberia, Russia. My parents didn’t want me to become an artist and I myself was not much into teaching. Thus, I took a somewhat standard path graduating from a university with a degree in economics. I ended up working as a web designed and later as a photographer though. As a hobby I started drawing illustrations that would be published by local magazines.

To change my life I left Russia in 2007. The original plan was to go to Asia and travel there for a few months but I never actually came back to Russia. In today’s world Internet empowers people to work and live in places they find interesting and challenging. Living in Asia I was able to work for companies all over the world.
I currently live in Philippines. Together with my boyfriend we rent a nice spacious house and I can finally devote some time to my beloved hobby of creating unique paper dolls.

How did you start making paper dolls?
I started with cutting and assembling a few paper dolls for myself. They reminded me of my childhood. I loved the process so much that I kept making them in different shapes and colors. I never thought of selling them but somehow a word spread and people started buying my dolls.

What inspires you?
Other artists and craftsmen inspire me a lot. It’s amazing what ideas people come up with. The boundaries of one’s imagination and creativity are indeed limitless. Once again Internet helps us all to share our ideas with the whole world. When I see something really beautiful and unique I feel an urge of going to my studio and creating, creating and creating!
Thank you, Maria!

Monday, June 4, 2012
GIY Tutorial How to make felted bracelet with buttons
I still have some buttons left from my crocheting adventure. I don’t like nice items to rest idle on my working table in my studio so I came up with an idea of a felted bracelet with buttons.
To make the bracelet we will need undyed felting wool, buttons of different colors and sizes, bubble plastic wrap, a needle and a white thread.

I first started with felting a bracelet. If you don't feel like felting today you can always buy a prefelted wool in any of craft and supplies stores. If you decide to go with a prefelted piece just cut a rectangle shaped piece out of a prefelted wool. The measurements could be about 2 and ½ inch by 9 and ½ inch.

I prefer to felt a bracelet myself as, thus, I’m able to make it as soft and thin as I wish.
On a bubble wrap piece of paper I lay out pieces of wool to form a rectangle. The rectangle will later turn into the bracelet. Since the wool will shrink I make the rectangle about 30% bigger that the original size. I’ll go with about 3 and ½ inch by 12 inch shape this time.

Once the rectangle is formed I wet it with clear water and add soap. Liquid soap should be fine. Once the piece is all wet and soapy I cover it with the rest of bubble plastic paper and start the process of felting. I stroke and rub the plastic helping wool fibers to bind and felt. When the wool has felted I rinse my bracelet in clear water and let it dry completely.

On my bracelet I lay out buttons of different sizes and colors. I can color coordinate them and add some extra buttons here and there for the pattern to look the way I want it to be.
I sew on buttons one by one with a needle and white thread. It makes sense to sew largest buttons first. It will help you preserve the original pattern and distribute buttons evenly on the bracelet.

Once all the buttons are on the bracelet it’s time to make a snap. One of the buttons can easily be used as a snap. Just make a cut on the opposite side of the bracelet for the button to fit in.
The bracelet looks bright and unique! It can be a great gift for someone who loves buttons. One can always substitute simple buttons with vintage ones or use dyed wool instead of white one as a base.
Happy crafting!

Chocolate walnut brownies recipe
For Sunday lunch my husband Andrei baked chocolate walnut brownies from a book Sweet Melissa by Melissa Murphy. We fell in love with Melissa's pastry at her cafe Sweet Melissa in Prospect Park, Brooklyn, New York. The recipe is simple yet brownies turn out to be delicious.
To bake chocolate walnut brownies we will need:
2 sticks of unsalted butter
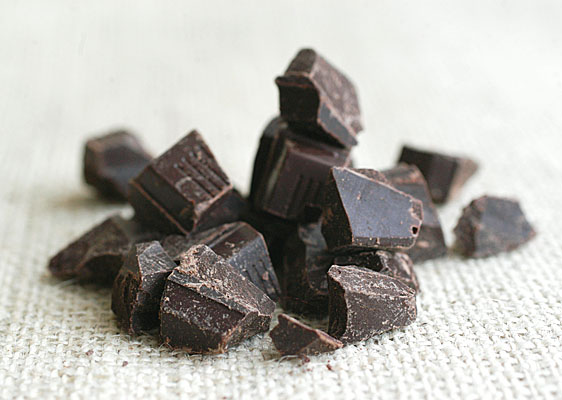
4 ounces of high quality Belgian unsweetened chocolate, chopped
2 eggs
1 and 1/2 cups of sugar
1 teaspoon of pure vanilla extract
1 cup of all-purpose flour
1/2 teaspoon of salt
2/3 cup of walnuts, chopped
Melt the butter and chocolate. Remove from the heat and keep warm. In a separate bowl beat together eggs, sugar, and vanilla on medium speed for about 2 minutes. Add the melted chocolate and mix. In yet another bowl whisk together the flour and salt.

Add the flour mixture to the chocolate mixture in 3 batches, mixing on low speed until just combined. Scrape down the sides of the bowl. Add the nuts by hand.

Preheat the oven to 350F. Butter and flour a square shape cake pan. Pour the mixture into the pan. Bake for 45 to 50 minutes or until the sides begin to pull away from the pan. Remove to cool. When cool cut into 12 brownies and serve.
The secret of the brownies is in the high quality chocolate. A great place to buy such chocolate is Trader Joe's stores where it's sold in big bars for a very reasonable price.


